4.1.2.5 _System authority popup_
In the system authority request form, when the "Add" button of the authority to be requested is clicked, the following popup screen is displayed: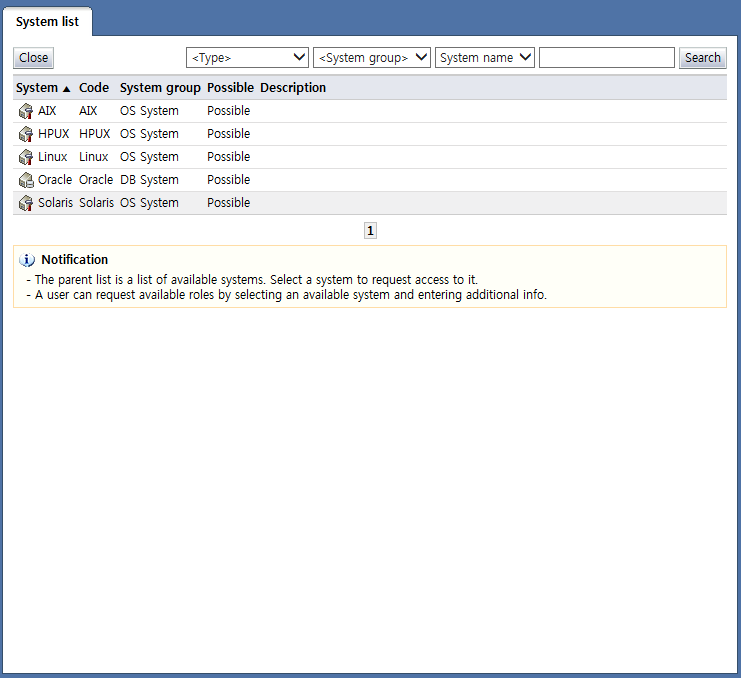
<System authority request popup>
On this popup screen, only systems (OS, DBMS, network equipment) where authorities that can be requested by the user exist are shown in the list.
To add an authority to be requested, select the system item to be requested. This brings up a screen where additional info necessary for system account creation can be entered.
Each of the items is described below.
System: Displays the system name. The icons denote system types.
 : OS
: OS : DBMS
 : Network equipment
Code: Displays the system code
System group: The system group where the system belongs is displayed.
Description: A description of the system is displayed.
The buttons are explained below.
Close: Closes the popup screen
Search: Shows the authorities that can be requested with the selected search conditions
The following is the screen shown when the system item to be requested is selected from the requestable systems list: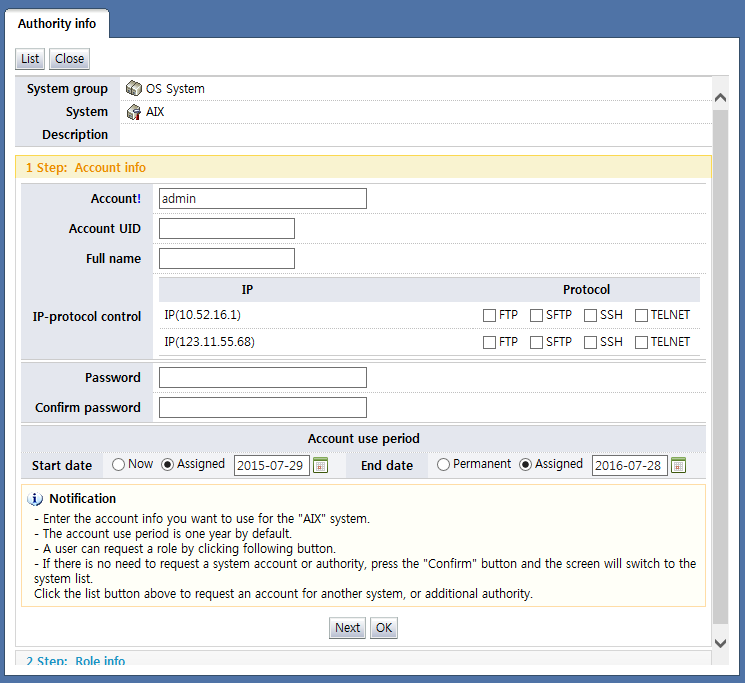
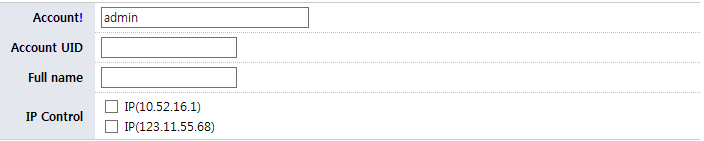
<Enter the account info of the system to be requested>
On top, info of the system to be requested is shown. On the bottom, input of the info necessary for the request is received.
The info necessary for the request is inputted in a 2-step process.
In step 1, additional info necessary for account creation is entered. In this step, the info entered differs according to the settings and the resource type.
On the screen shown above, a screen for AIX OS account request, the "Account policy" of the resource is set to "Use designated account" or "Enter additional info", and the "Provision policy" of the resource account is set to account standard. In addition, if the system is synced with access control and system, IP-protocol requests, IP requests, and protocol requests are possible.
If the "Account policy" of the resource is set to "Use account mapping", and the "Provision policy" of the resource account is set to account standard, the account password is received as input as shown below.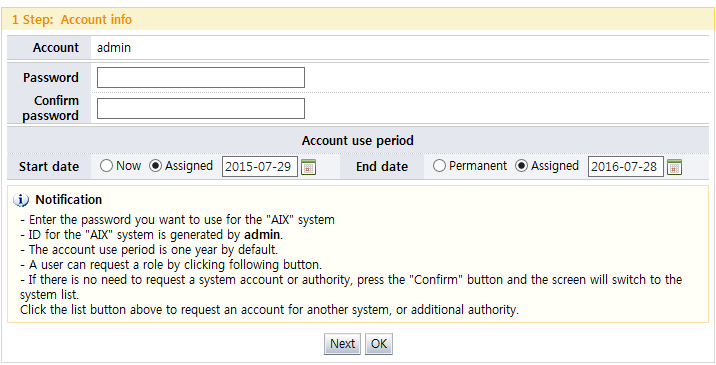
As seen above, the step 1 enter account info screen is configured differently depending on the account policy and provision policy of the resource.
Depending on the resource policy, the following is displayed on the screen:
If the resource account policy is Use specified account/Enter additional info
If the resource account provision policy is Account standard
The form for entering additional info required for system account creation is displayed
The form for entering the password of the system account to be created is displayed
If synced with access control, IP-protocol request, IP request, or protocol request is displayed depending on the network control of access control.
The account usage period input form is displayed
If the resource account provision policy is User standard
The form for entering the password of the system account to be created is displayed
The account usage period input form is displayed
The account usage period input form is displayed
If the resource account policy is Use account mapping
If the resource account provision policy is Account standard
The form for entering the password of the system account to be created is displayed
The account usage period input form is displayed
If the resource account provision policy is User standard
The account usage period input form is displayed
In addition, if the system to be requested is syncing with access control, the network info that can be entered varies according to the network control policy of access control.
The screen input depending on the type of access control network control policy type is as follows:
This is shown only when the account policy of the resource is "Use specified account/Enter additional info" and the provision policy is "Account standard".
IP-Protocol control : Select the protocol to be used in the IP or IP band registered to the user in the system with the account to be requested.
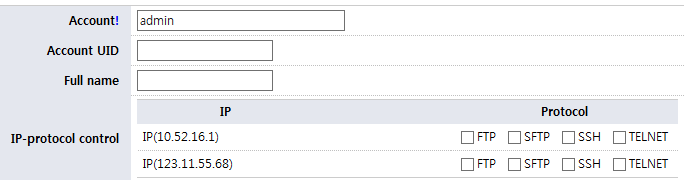
IP control : Select the IP to be used in the IP or IP band registered to the user in the system with the account to be requested.
Protocol control : Select the protocol to be used in the system with the account to be requested.

When step 1 info has been entered in this manner, click the "Next" button to bring up the step 2 role info screen.
In step 2, the role info to be used by the account to be requested is selected. Only the role info that the user can request is shown.
The following is a screen showing a list of roles that the requester can request: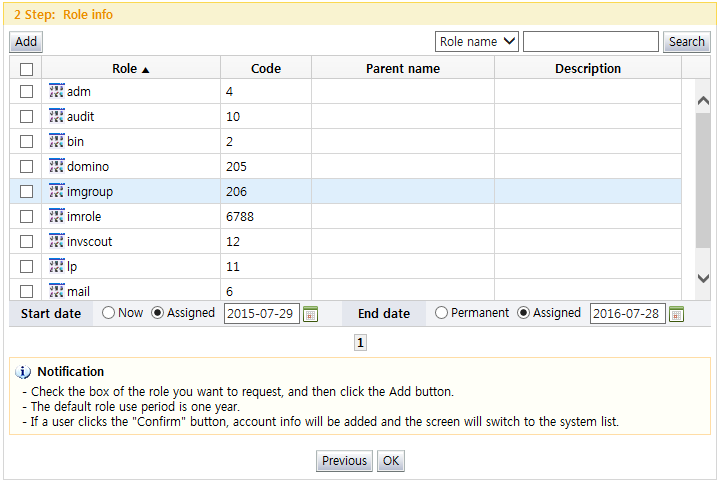
<Role info>
In this step, when the role to be requested is selected, the usage period for that role is selected, and the "Add" button is clicked, the role is added under the authority to be requested on the main screen.
Each of the items is described below.
Checkbox: Select the checkbox of the role item to be requested and click the "Add" button to add as an authority to be requested.
Role: Displays the role name
Code: Displays the role code
Parent name: If the role has a hierarchical structure, the parent name of the role is displayed.
Description: Displays a description of the role
The buttons on the screen for step 2 are described below.
Add: Adds the checked items under the authority to be requested on the main screen
Search: Shows the role info corresponding to the info entered in the list
Previous: Shows the step 1 account info screen
OK: Brings up the list
|
※ Note |
|
If the authorities are not shown on the request authority popup of the profile center, please check the following:
|