4.1.2.10 Basic account authority request
When Basic Account Authority Request is selected in the request list, the following screen is brought up: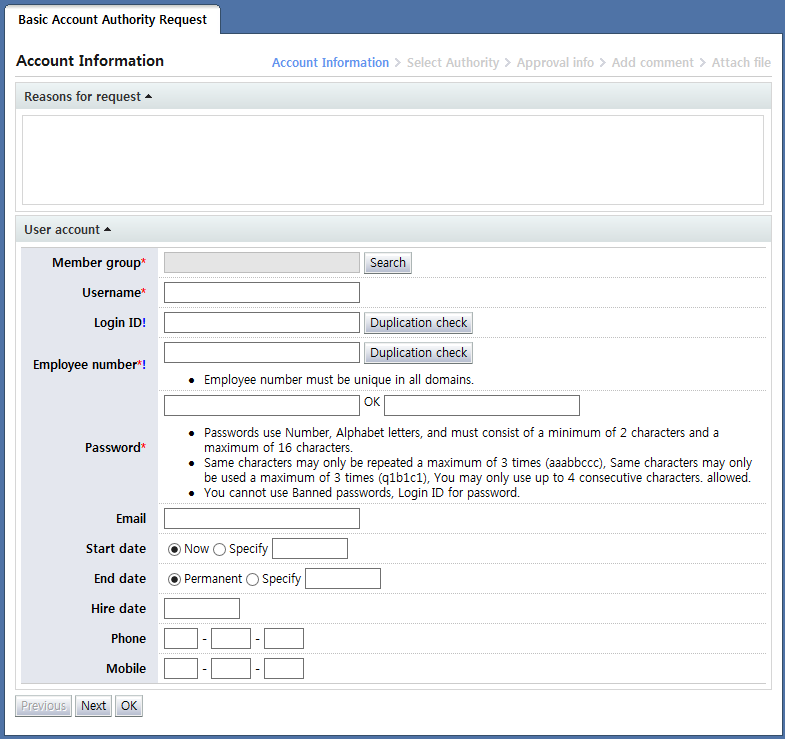
<Basic account authority request>
In Basic account authority request, a request form to create accounts for new users and grant authorities to new users is provided. Each of the items is described below.
Member group: Select the group where the added member will belong. When the "Search" button is clicked, the following group selection popup is displayed:
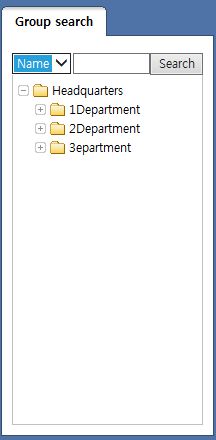
<Group selection popup>
On the tree above, select the group where the user to be added will belong.
Username: Enter the name of the user to be added.
Login ID: Enter the login ID to be used by the user to be added. The login ID must be a value that is not redundant within the IM. A duplication check must be performed for the login ID that has been entered. If a duplication check is not performed, it is not possible to proceed to the next step.
Employee number: Enter the employee number to be used by the user to be added. The employee number must be a value that is not redundant within the IM. A duplication check must be performed for the employee number that has been entered. If a duplication check is not performed, it is not possible to proceed to the next step.
Password: Enter the password to be used by the user to be added. The password entered must comply with the password policy. If a password that does not comply with the password policy is entered, it is not possible to proceed to the next step.
Email: Enter the email of the user to be added.
Start date: Set the time when the user to be added will start to be used. When this setting is set to now, the user can be used immediately after the user is added following approval.
End date: Set the time until the user to be added can be used. If this setting is set to permanent, the user can be used until deletion.
Hire date: Enter the hire date.
Phone: Enter the telephone number.
Mobile: Enter the mobile phone number.
After entering each item, click the "Next" button to bring up the following screen, where the authorities to be used by the user to be added can be selected: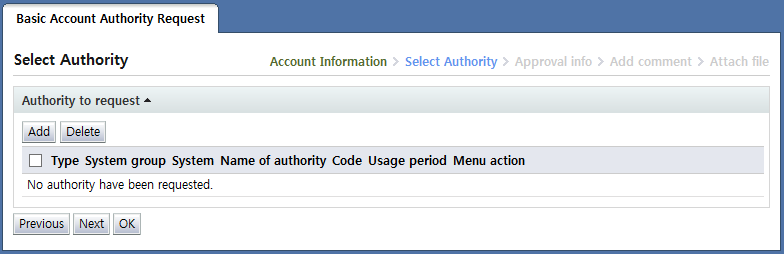
<Select authorities>
Here, click the "Add" button to bring up the request application authorities popup: For more details, refer to
<Application authority popup>
.
After entering request info, click the "Next" button and enter additional approval info.